In Maya 2016.5, the new Shape Editor was introduced, giving a powerful new workflow for blendshapes in Maya. We now have access to Mudbox-style brushes, erase targets, a powerful smooth delta brush, and you can sculpt shapes directly on your mesh, while other shapes are turned on.
Also, the new combinationShape node was added. If you've created a corrective shape in the Shape Editor, you've likely already seen this node.
The combinationShape node drives corrective shapes in the Shape Editor by combining the values of multiple blendshapes. But forget about corrective blendshapes for a moment. You are free to use it manually.
In a more general way, when you set combinationShape to "lowest weighting", it just outputs the MINIMUM value of all of its inputs. And you can connect as many inputs as you want.
The interesting trick I discovered is that if you hook up the inputs and outputs to reverse nodes, you get the opposite effect. The output result is the MAXIMUM value of all of the inputs.
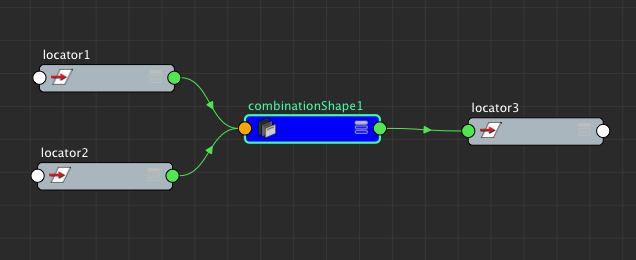
So now we have the ability to measure the MIN and MAX values of an arbitrary set of attributes using Maya nodes. Here is what it looks like when driving translateY on a set of locators:
Without reverse nodes is MIN:
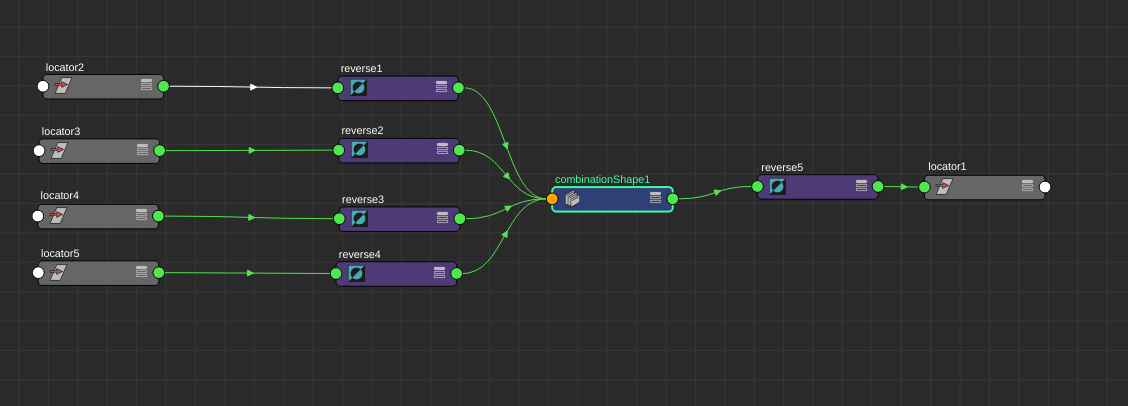
With reverse nodes is MAX:

Here is what the graph looks like when using reverse nodes, connecting the translateY of multiple locators, to the translateY of a result locator:
To use this node, just create it with cmds or PyMEL
import pymel.core as pm
combo = pm.createNode('combinationShape')
The inputs have an index.
combo.inputWeight[0]
combo.inputWeight[1]
combo.inputWeight[2]
The output is outputWeight
combo.outputWeight
And there is a .combinationMethod attribute which changes how the result is calculated.
# set it to "lowest weighting". Default is "multiplication"
combo.combinationMethod.set(1)
So why would we use this?
The main reason I use this node is because of a bug/limitation in Maya (as of Maya 2017). If you set up a combination blendshape in the Shape Editor, and you have the shape connected to a driving attribute or controller, you can no longer hit "Edit" on the shape and sculpt on it. That means you have to sculpt your corrective shape and then connect it. And if you want to edit the shape later, you have to temporarily disconnect it from the rig. That is very annoying!
Here is my workaround. Instead, I do not use combination shapes in the Shape Editor. I create an empty blendshape. Then I manually connect my combinationShape nodes onto "hook" attributes on an empty group node. The "hook" has the same names as the blendshapes, and then I connect it directly to the empty blendshape and sculpt the fix there. If you do it that way, you can hit "Edit", even after it is connected.
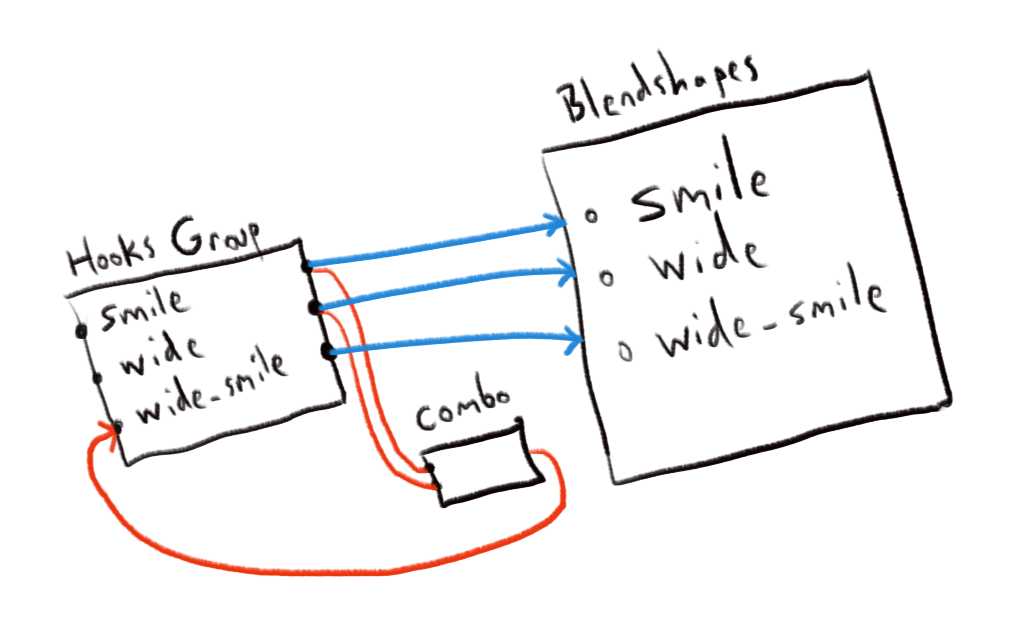
EDIT: In a previous version of this article I had showed outputs coming out of the blendshape node. This is a big mistake. I'll write more about why later. But in short, you don't want the functionality of your rig to depend on the geometry.
Store all of your connections on the hooks. And then you can freely replace the blendshape or add another blendshape (for example, the eyebrows) and reconnect it without changing the rig. EDIT
Ideas That Don't Involve Blendshapes
I'll be honest. I haven't been able to think of a single reason to use this in a production rig yet, except for blendshapes. These ideas are rough and some are not practical or useful at all! But maybe this will help someone get the ideas rolling.
- Measure the stride length of your character, even if it has 3, 4 or more legs.
- Measure a series of integer switches or visibility and drive the result only when all are True or all are False.
- Generate your own custom bounding box of transforms around a character.
- Drive a body part with 2 or more controls (this is basically a corrective shape, but now you can drive it with any attributes you like.)
- Set camera clipping planes based on the positions of a group of objects
- Drive complex animated pivots based on where certain controls are located
- It will likely be more useful for people doing motion graphics or data visualization. Abstract rigs more than character rigs.
I hope this was helpful. Do you have some practical ideas for how to use this in your own rigs?
